January 20, 2025: Leftie Go Dark
Two bulbs to solve one black eye.
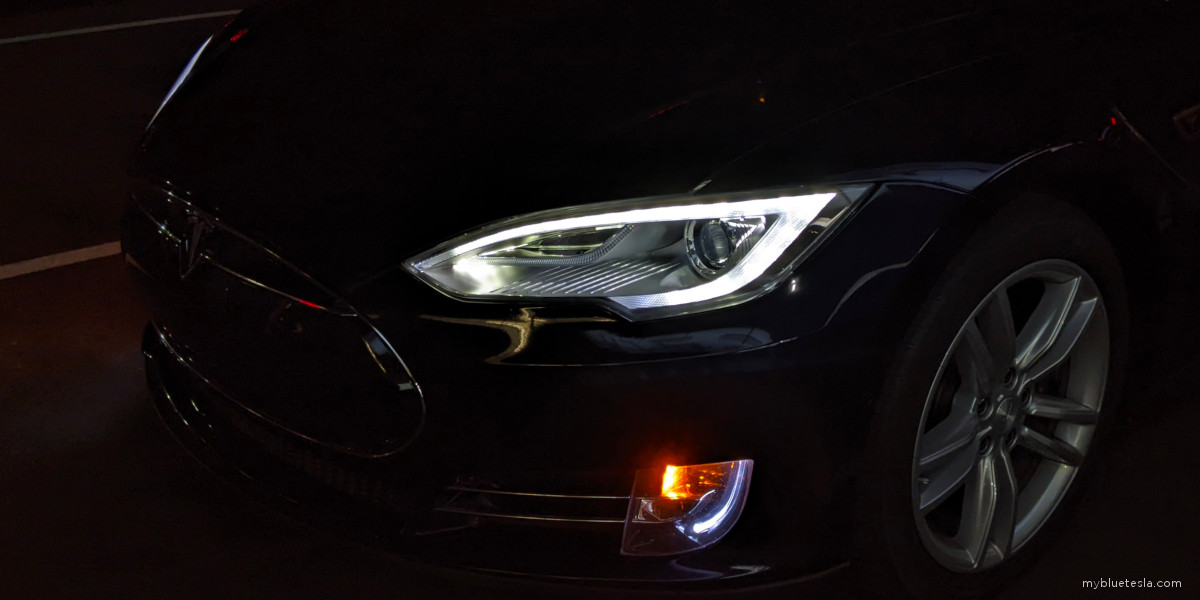
For the last year the driver's side headlight has been occasionally flickering out while driving, causing me to toggle the lights between Auto and Off to bring it back to life. In the last few months this has become more frequent and annoying.
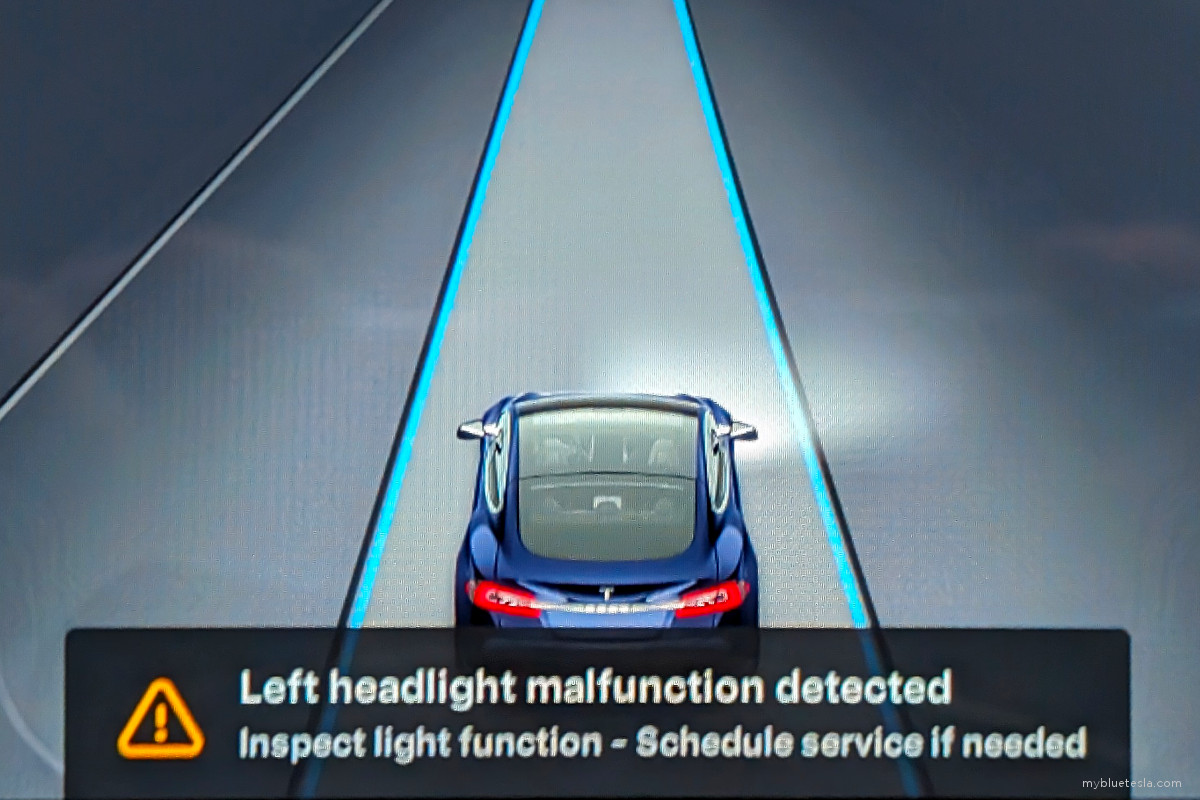
I finally decided that the original, decade-old bulbs have reached their end of life and checked YouTube and Reddit DIYers who have graciously documented the repair process for us mere mortals. 10 years is apparently the guarantee by the manufacturer, so right on time.
I purchased a couple of "OEM 66340 OSRAM D3S Xenon HID Headlight Bulb" units from an Amazon seller. Normally these apparently come with a 7-digit authenticity code on the side of the packaging that can be verified to ensure you purchased an original, genuine product rather than a fake from a random third-party. However the label code on my box was 11 digits and the Amazon seller explained that this was a factory batch code for bulk orders (rather than a retail box which is 7 digits). I emailed OSRAM to confirm this claim but didn't get a response in time for the scheduled weekend install.
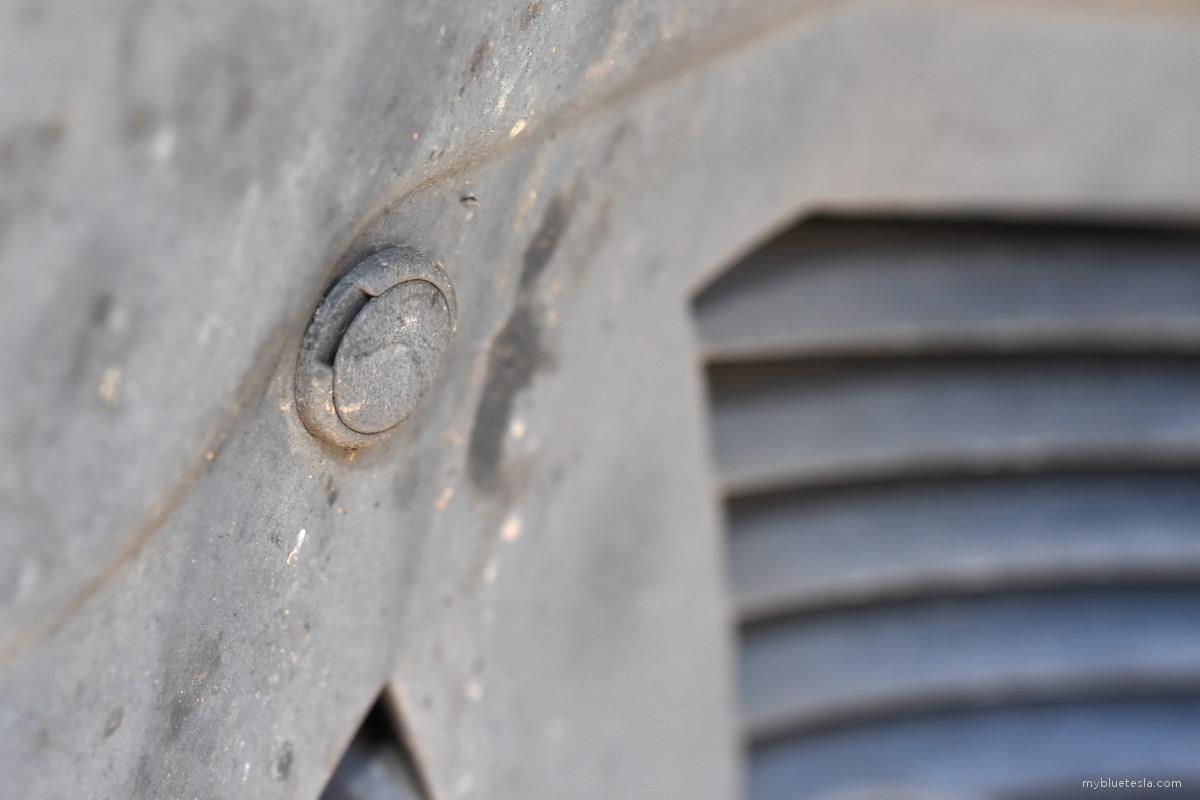
Unlike cars where I've easily replaced bulbs by opening the hood, apparently with the older Model S one undergoes a much lengthier procedure involving jacking up the car, removing the wheel, removing most of the plastic retainer clips holding the wheel well liners in place (there are about 12 of them), prying the liners back, dealing with the dust that flies towards you (protip: might be worth wetting down this area with a spray bottle of water), popping out the rubber cap in the rear of the headlight assembly, somehow squeezing your fingers into the rear opening and reaching past the sides of the ignitor housing to rotate (counterclockwise, quarter turn) the black plastic lock collar holding the unit in place which is barely visible when working from the side of the vehicle, and then finessing the damn thing out. If you have fat fingers, you may need to lose 60 pounds first.
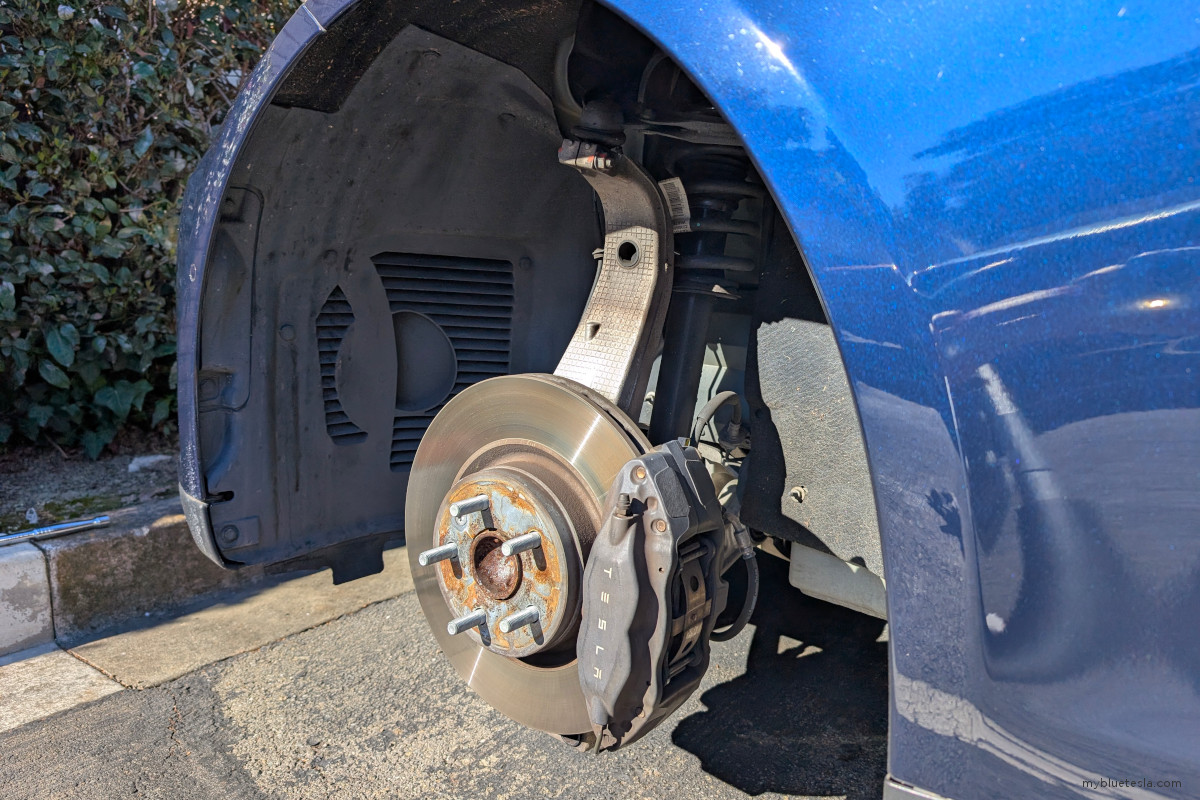
This open slot on the rear of the headlamp assembly provides almost no clearance, especially with the power cable and the connector for it somewhat blocking the way as you're pulling the old bulb out. The little leverage you have with the wheel well liners already somewhat in the way compounds the frustration. Maybe it would've been worth it to just remove the liners entirely.
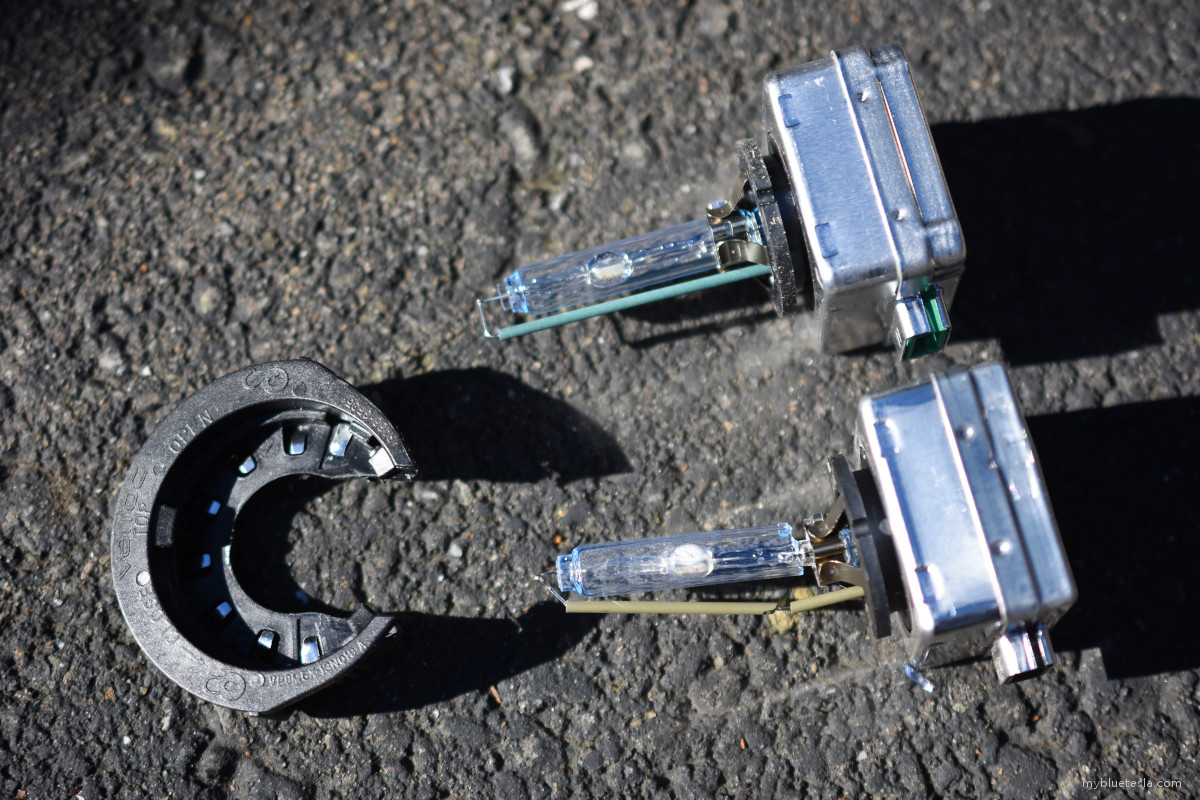
Comparing the old and new units (old at bottom, which I broke while twisting and turning the unit on the way out):
I was planning on replacing both bulbs today but during my first attempt I destroyed the replacement bulb as it's difficult to see inside the lamp assembly. I'm sure my neighbors could hear my verbal scuffle as creative metaphors were uttered in the afternoon air. $50 instantly down the drain.
My second try with the bulb originally allocated for the passenger side was a success. There's an extra metal post with a small circular opening where the front of the bulb has to be guided through about an inch deep behind the lamp assembly housing's rear opening, otherwise cracking the bulb is inevitable. This was hard to see on my first try given the angle I was trying to fit the replacement through.
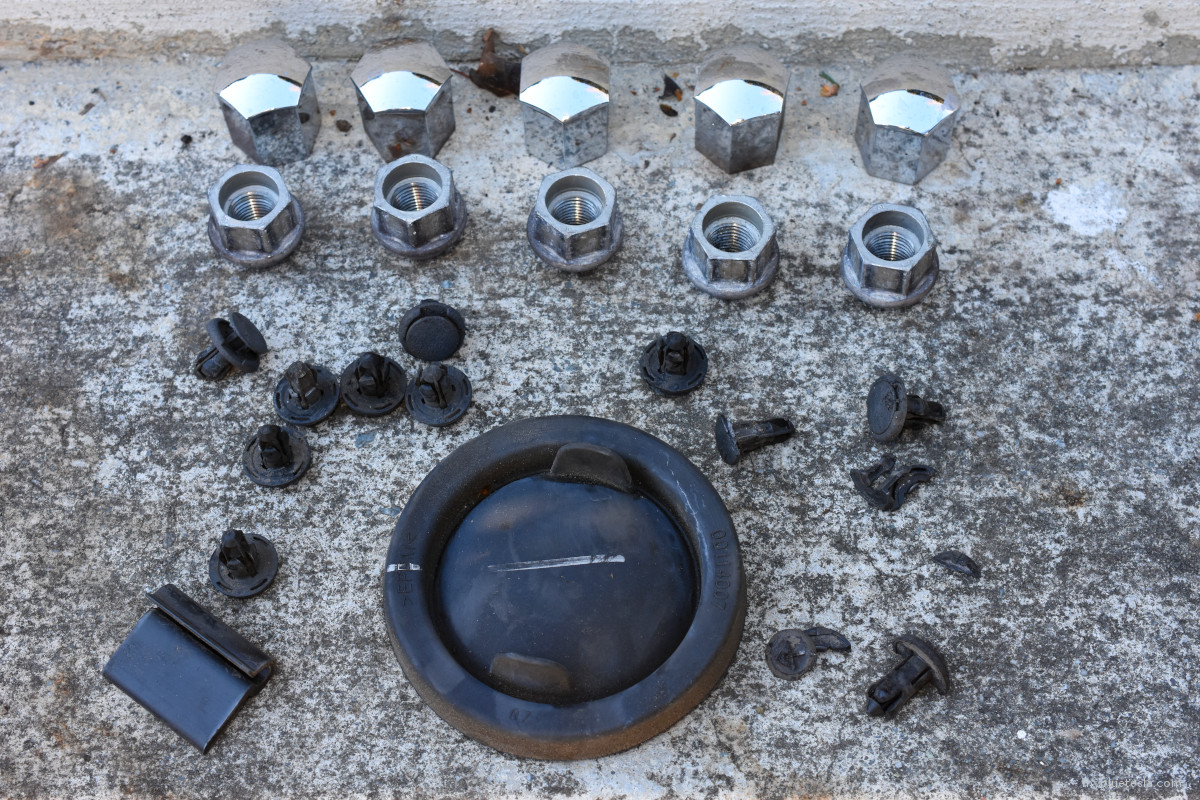
Note that the plastic retainer clips for the wheel well liner often aren't reusable after removal. Some of them had become too brittle over the last decade and crumbled when prying them out. Their design seems to be single-use. Luckily you can buy them off Amazon (search for "Rexka 20pcs 8mm Hole Bumper Push Type Retainer Plastic Clip for Tesla" although there are other sizes which might worth getting as well; the 8mm size seemed to work for my case). You insert the base part of the clip into the opening as far as it'll go, then push the top part in to "lock" it into place.
So now I need to spend another $50 to do the passenger side. Lame.
This would've been a much better repair experience if the lamp assembly's rear opening was at least an inch or two larger. The other option might've been to remove the front bumper, then remove the headlight assembly. Perhaps going in through the wheel well is slightly easier?
I'll say that a decade's run on the original bulb isn't too bad. These repairs are most frustrating on the first try. I'm currently around 165,000 miles so going through this once a decade isn't a massive inconvenience, all things considered. While the YouTube videos helped, there's a section for this procedure in the Model S Service Manual that I perhaps should've consulted early on. Not sure if it would've helped that much though.
Oddly enough, the original passenger side bulb doesn't look that much dimmer or noticeably off-color from the new one. I don't recall this bulb ever being replaced, so perhaps one day it'll just start fizzing out suddenly. I'll have a replacement ready to go when that happens.