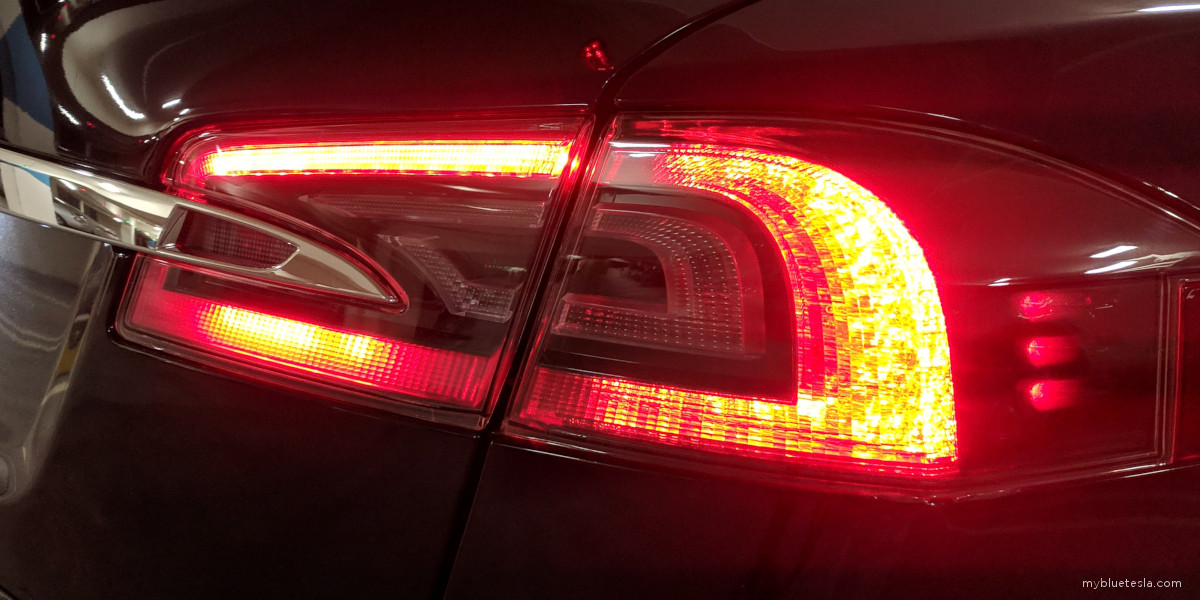
October 18, 2020: New Tail Light
All lights blinky.
Over a year ago before I took my cross-country road trip I decided to do something about the passenger-side rear tail lamp assembly and spent $230 for a replacement to do the swap myself. Over the years several LEDs fizzled to an early death, announcing to the world the car's inadequacy whenever the brakes were applied that yes indeed Tesla build quality is second-rate. This has been an issue since 2016 on my car but since I was out of warranty I've lived with it.
No more. I finally got around to this today.
YouTube videos came to the rescue, of course. Not exactly a difficult job, but not as easy as it was made out to be mainly because several people (including a Mobile Service tech I talked to last year) mentioned that instead of removing the large plastic interior hatch trim cover I could pull out the grab handle pieces and route my arm through the opening to remove a couple of screws ... if I have skinny arms.
I have skinny arms. But apparently not skinny enough as I couldn't reach 2 of the 4 bolts holding the old light assembly in place.
So I did it the hard way, partially detaching the interior hatch cover to gain access. The plastic auto trim removal tools are really helpful here. I used an 8mm socket to loosen the 2 bolts on the inside, then the same on the 2 accessible from the outside. Dental floss (not the soft kind) was used to wedge between the chrome appliqué piece just enough to detach the light housing from the double-sided tape. Detailers use a fishing line, but dental floss works in a pinch. After a little wrangling I pulled the assembly out and then disconnected the wiring harness.

This was a good opportunity to clean the painted surface areas which were covered up all these years. Then it was time to (satisfyingly) peel off the factory plastic on the new light assembly.

I applied some double-sided 3M tape on the inner and outer ends where the appliqué meets the tail light housing cutout and fitted it into place. Screw in the 4 bolts and feel that seal compress against the hatch. Boom, new hotness.

Getting the inside hatch cover back on was a bit of a pain with all those plastic snap-in pins that are difficult to line-up properly. I wasn't able to get it back perfectly in place on the driver's side so it's off by a couple of millimeters which is annoying but only visible when the hatch is opened.
Now let's take a look at the old assembly. You can see where the discoloration has occurred over the years along the bottom due to water and moisture intrusion.

The seal apparently shifted over time causing the moisture to seep through. I hope the newer versions of this assembly have addressed this since I'd really rather not go through this swap again.

I had also bought a replacement appliqué trim piece last year since I was under the impression that during the light assembly swap I may need to also change the appliqué. Not so in this case (as long as you're not excessively aggressive when lifting the assembly out of the hatch's lamp socket). It goes into the spare parts bin.
So with the car's rear looking "complete" once again I don't look so old-and-busted compared to all the other brand-new Model 3s and Ys rolling down the highway.